

Crispy Chicken Tenders for Kids: 7 Irresistible Steps
I have a confession about chicken tenders.
For a long time, I thought the easiest way to have them ready on a busy school morning was to buy a bag from the freezer section.
And honestly, sometimes that shortcut is useful.
But one afternoon, while preparing lunchboxes, I decided to try something different.
I had chicken breast in the refrigerator, a little butter, some honey, and half a teaspoon of mustard.
Nothing fancy.
Then I remembered a simple coating technique that doesn’t even need eggs.
A few steps later, I had homemade crispy chicken tenders for kids with a golden breadcrumb crust and a gentle honey-lemon flavor.
The real surprise wasn’t the chicken.
It was realizing I could prepare a bigger batch and freeze some uncooked breaded tenders for another day.
Now that’s the kind of kitchen trick I love!
Recipe at a Glance
Why These Homemade Chicken Tenders Are Different
These tenders begin with real chicken breast rather than a premade breaded product.
I season the chicken with melted butter, honey, lemon juice, a little black pepper, salt, and mustard.
Instead of dipping the pieces in beaten eggs, I prepare a smooth batter using flour, water, and a pinch of salt.
Then I coat the chicken in breadcrumbs.
It’s a straightforward method that creates a textured coating and allows me to prepare several portions at once.
The version shown in my lunchbox was fried, although oven and air-fryer cooking are possible alternatives.
Ingredients for Crispy Chicken Tenders
The marinade and coating amounts below reflect my original preparation. I didn’t measure the total chicken, flour, water, or breadcrumbs, so these quantities are adjusted to the number of tenders you’re making.
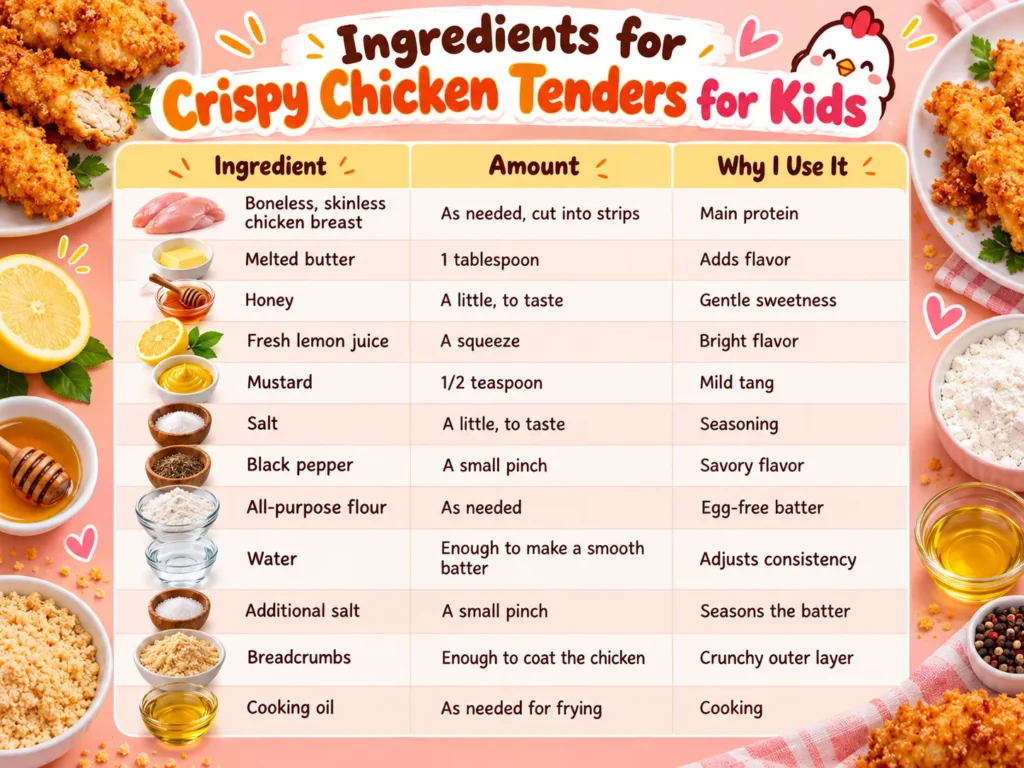
Mama Emily’s note: The flour-and-water batter does not contain eggs, but this isn’t automatically an allergy-safe recipe. Wheat, dairy, mustard, and other ingredients may still be relevant allergens, and packaged breadcrumbs need to be checked.
How to Make Crispy Chicken Tenders for Kids in 7 Steps
Step 1: Prepare the Chicken Breast
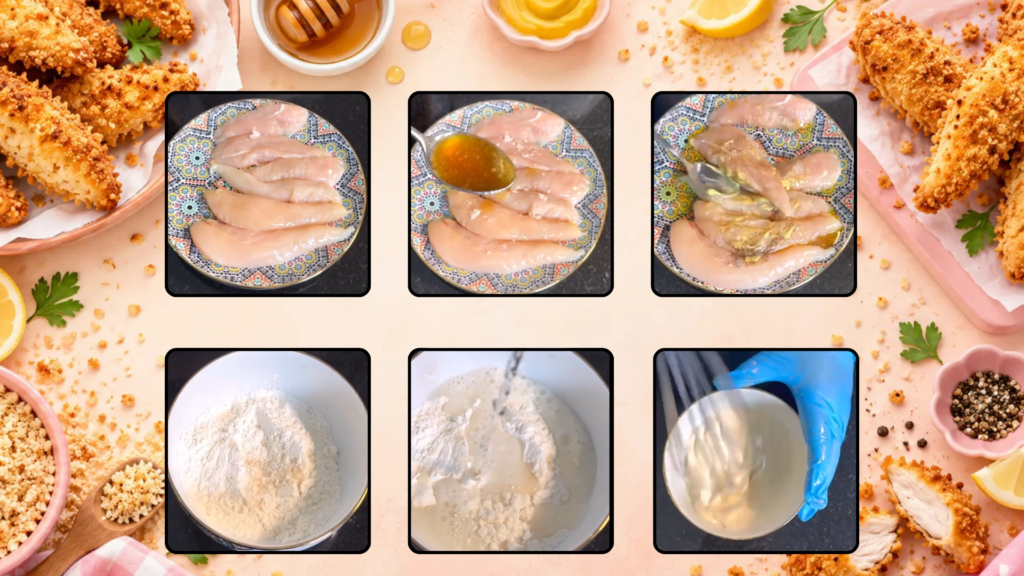
I start with boneless, skinless chicken breast.
If the pieces are large, I cut them into tender-sized strips.
I try to make the strips reasonably similar in thickness, because uneven pieces won’t cook at exactly the same rate.
Before starting, I set up a clean workspace with separate areas for raw chicken and the ingredients that are ready to eat.
Step 2: Make the Honey-Lemon Marinade
Next comes the flavor.
I add salt, black pepper, melted butter, a little honey, fresh lemon juice, and half a teaspoon of mustard to the chicken.
Then I mix gently until the strips are coated.
I like the combination because the lemon brightens the flavor, while the honey and butter add a gentle richness.
There’s no need to make the marinade excessively sweet.
A small amount is enough.
Step 3: Prepare the Egg-Free Batter
Now for my favorite little trick.
In a separate bowl, I combine flour with a small pinch of salt.
Then I gradually add water while whisking.
I keep mixing until the batter becomes smooth and creamy.
It should be fluid enough to coat the chicken, but not so watery that it immediately runs off.
Think of a smooth, moderately thick pancake batter rather than a stiff dough.
And don’t taste it raw: uncooked flour can contain harmful bacteria.
Step 4: Coat the Chicken in Batter
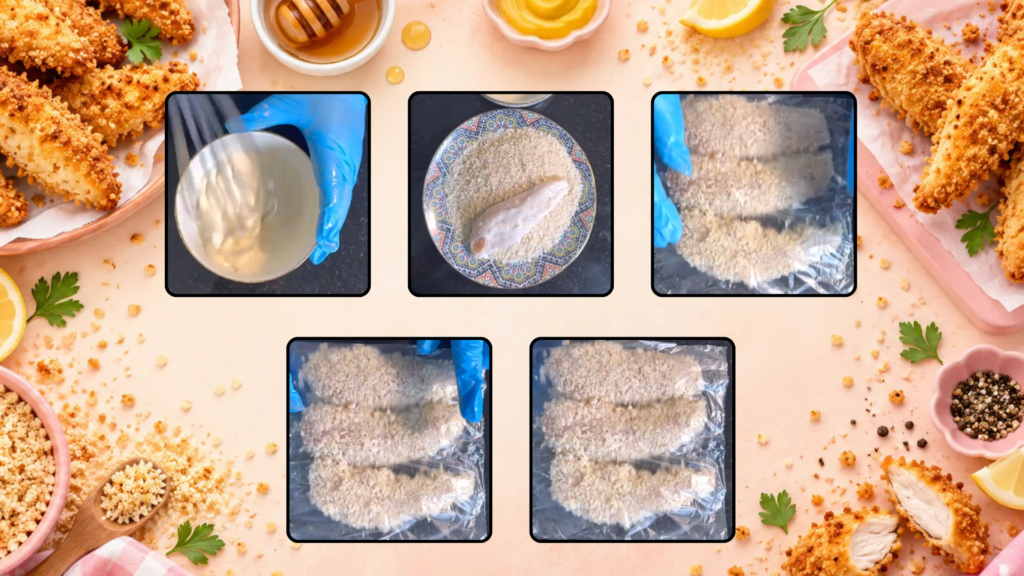
I take one seasoned chicken strip at a time and dip it into the flour-and-water mixture.
I turn it gently so the coating reaches all sides.
Then I let any excessive batter drip back into the bowl.
This helps the breadcrumbs adhere more evenly.
I keep my prepared chicken separate from clean utensils and ready-to-eat food.
Step 5: Cover with Breadcrumbs
Next, I place the coated strip into a plate of breadcrumbs.
I turn it and press lightly until the surface is evenly covered.
Repeat with each chicken strip.
At this stage, the chicken tenders are ready to cook or freeze promptly for another day.
I love seeing the prepared tenders lined up before cooking.
It’s like having my own little kitchen production line!
Step 6: Cook Until Golden and Fully Done
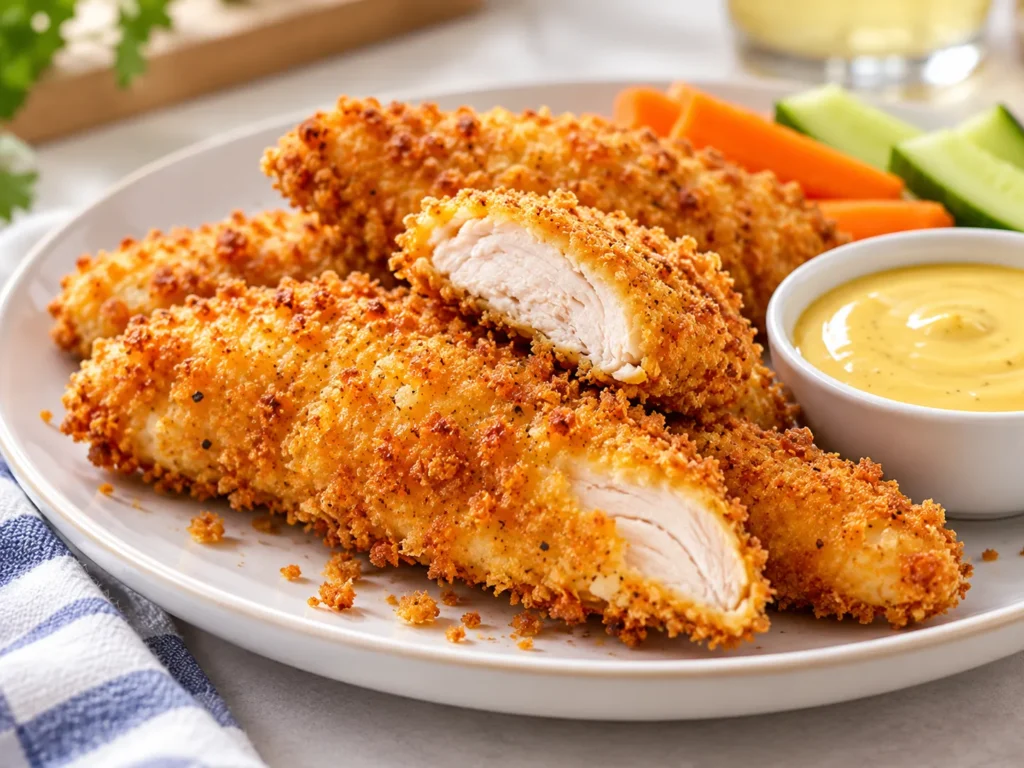
For my School Lunchbox Idea #12, I fried the breaded tenders until golden.
If you’re frying, use an appropriate amount of cooking oil and turn the strips carefully so they brown evenly.
You can also cook them in an oven or air fryer if you prefer those methods.
Cooking temperature and duration will depend on the appliance and the size of the chicken pieces.
The essential safety step is checking that the center of each tender reaches 165°F (74°C) with a food thermometer.
Don’t rely only on the golden color of the breadcrumbs.
Step 7: Serve or Pack for School
When the tenders are fully cooked, I remove them from the heat.
For dinner at home, I serve them warm.
For school lunches, I cool and refrigerate them promptly, then pack them chilled in a leakproof lunchbox inside an insulated bag with cold sources.
Mama Emily’s Best Tips for Crispy Chicken Tenders
Keep the strips similar in size
This helps them cook more evenly and makes it easier to check the center of each one.
Don’t make the batter too watery
A thin coating may not hold the breadcrumbs well. Add the water gradually until the texture is smooth and creamy.
Press the breadcrumbs gently
You want them to stick without crushing the chicken.
Don’t overcrowd your cooking surface
Work in batches when needed. Giving the pieces enough space helps them cook more evenly.
Remember that packed chicken won’t always stay crispy
I love these tenders freshly cooked, but the breading can soften after refrigeration. That’s completely normal.
For school, I focus on safe storage and a lunch my child enjoys, rather than promising restaurant-level crunch hours later.
My Favorite Freezer Preparation Trick
Here’s the part that makes this recipe especially useful for busy parents.
When I have time, I prepare more chicken than I need for one lunch.
Sometimes I make a large batch using several pounds of chicken breast.
I season the strips, coat them in batter and breadcrumbs, and place the uncooked pieces in a single layer on a lined tray.
I freeze them promptly until firm, then transfer them into labeled freezer-safe bags or containers.
The package should clearly say RAW CHICKEN — COOK BEFORE EATING.
I keep uncooked chicken away from ready-to-eat food and clean all equipment that touched it.
When I’m ready to use the tenders, I can thaw them safely in the refrigerator and cook them thoroughly to 165°F (74°C).
Freezing makes preparation easier, but it doesn’t make raw chicken cooked or ready to eat.
Frequently Asked Questions
Can I make these chicken tenders without eggs?
Yes. My original recipe uses a batter made from flour, water, and salt instead of eggs.
Can chicken tenders be made in an air fryer?
Yes. The breaded strips can be cooked in an air fryer, although the time depends on their thickness and the appliance. Always check the internal temperature.
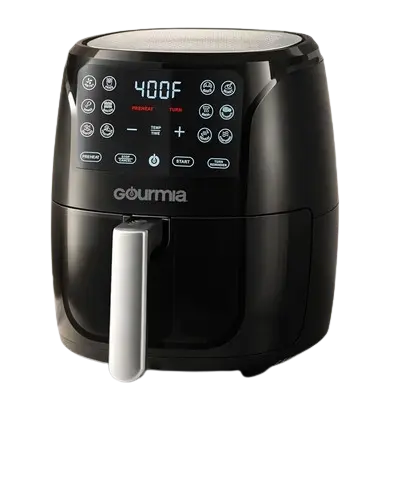
Gourmia 6 Qt Digital Air Fryer
Busy school mornings? Make family cooking a little easier with this digital air fryer! Perfect for exploring homemade chicken tenders, cheesy potato wedges, roasted vegetables, and other family favorites.
- 6-quart family-friendly capacity
- 12 convenient cooking presets
- Digital touch controls
- Adjustable cooking temperature
- Dishwasher-safe basket and crisper tray
- Useful for small-batch family cooking
Check Amazon for current pricing, availability, customer ratings, and product specifications.
As an Amazon Associate, I earn from qualifying purchases.
Can I freeze breaded chicken tenders before cooking?
Yes. Freeze them promptly, store them securely, and clearly label them as raw chicken. Thaw safely and cook thoroughly before serving.
Can I use chicken breast instead of packaged chicken tenderloins?
Absolutely. That’s what I used in this recipe. Cut the breast into similarly sized strips.
How do I pack chicken tenders for school?
Cook them completely, refrigerate them promptly, and pack them chilled in an insulated lunch bag with at least two cold sources.
A Little Crunch and a Lot of Love
These crispy chicken tenders for kids remind me why I enjoy homemade cooking.
Sometimes a simple change—like using an egg-free batter or preparing extra portions for the freezer—can make a familiar recipe feel new.
And sometimes the biggest victory isn’t creating something fancy.
It’s opening the freezer on a busy morning and realizing part of tomorrow’s cooking is already prepared.
Want to see the complete meal? Visit School Lunchbox Idea #12 for the full lunchbox combination.
💗 Looking for more little kitchen shortcuts? Follow LunchboxBloom on Facebook for kid-friendly recipes, lunchbox inspiration, and practical tips from Mama Emily’s kitchen.